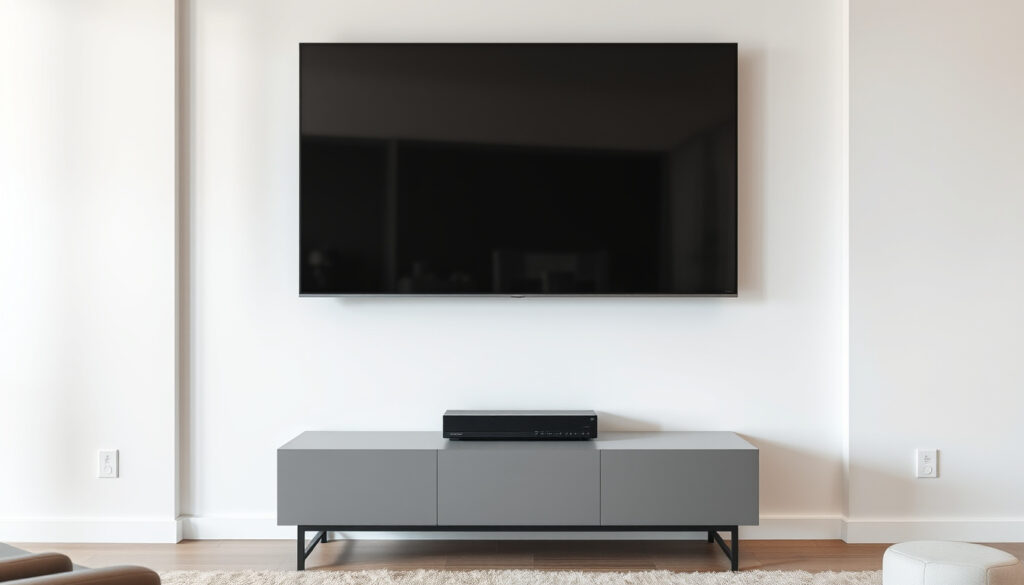
Wall Mount TV: Pros, Cons, Installation Guide & Mistakes
You’ve bought a new flat-screen and the idea of floating it on the wall feels right. No stand, no cabinet, just the screen. But before you pick up a drill, there’s one thing every installer wishes people knew first: most TV mounts fail not because the bracket is bad, but because the wall behind it wasn’t ready.
Average weight of a 55-inch TV: 30-40 lbs ·
Standard stud spacing: 16 inches on center ·
Most common VESA pattern: 200×200 or 400×400 mm ·
Recommended viewing distance: 1.5x screen diagonal
Quick snapshot
- Saves floor space and reduces clutter (CNET tech guide)
- Improves viewing angle and ergonomics (CNET)
- Reduces glare from windows and lights (CNET tech guide)
- Gives a modern, built-in look (CNET tech guide)
- VESA pattern required (most TVs 2006+ are compatible per Kanto Mounts)
- Weight and size limits must match mount rating (ITS Hawaii safety guide)
- Check wall type: drywall needs studs, brick/concrete needs masonry anchors (Kanto Mounts)
- Ideal mounting height varies by viewer preference and room layout
- Best mount type (fixed, tilting, full-motion) depends on wall and viewing angles
- Safety of a DIY install for someone without experience depends on individual skill
- Measure your TV’s VESA pattern
- Buy a mount rated for your TV’s weight and size
- Locate wall studs before drilling
- Decide on DIY vs professional installation
| Specification | Value |
|---|---|
| Average weight of a 55-inch TV | 30-40 lbs |
| Standard VESA pattern for 55-inch TV | 400×400 mm |
| Minimum drywall thickness for mounting | 1/2 inch with stud |
| Recommended TV center height | 42 inches from floor |
Is it a good idea to wall mount a TV?
Wall mounting saves floor space and gives a clutter-free living room. It also puts the screen at a better ergonomic height — the center of the display should align with your seated eye level or slightly below, according to CNET’s home entertainment team. But there are trade-offs. Once the TV is on the wall, adjusting it or moving it later is more work. And if the mount isn’t installed into solid studs, the whole setup becomes a safety hazard.
Pros of wall mounting
- Frees up floor space from a TV stand or cabinet.
- Enables better viewing angles — tilt and swivel mounts can adjust for glare or different seating positions.
- Gives a clean, modern look that blends into the room.
- Reduces the risk of tip-overs in homes with children or pets.
Cons of wall mounting
- Harder to connect cables or access ports behind the TV.
- Moving the TV to a different room requires patching the wall.
- Installation requires tools and careful stud location.
- Larger TVs (65-inch+) are heavy and need two people to lift safely.
Can any TV be put on a wall mount?
Most flat-screen TVs sold after 2006 include standard mounting holes on the back, following the VESA pattern standard. However, older models or some small entry-level sets may lack these holes. Kanto Mounts, a wall-bracket manufacturer, explains that VESA describes the horizontal and vertical distance between holes in millimeters — for example, 200×200 or 400×400 mm. If your TV doesn’t have a VESA pattern, adhesive mounts or universal adapter plates are available, but they are less secure.
VESA compatibility explained
VESA stands for Video Electronics Standards Association. The pattern is the distance between the center of the left-right mounting holes and the top-bottom mounting holes. To find yours, measure horizontally and vertically, then convert inches to millimeters (1 inch = 25.4 mm). Kanto Mounts provides a measurement guide for this.
TV weight and size limits
Every wall mount has a maximum weight capacity. An ITS Hawaii installation safety guide warns that using a bracket not rated for the TV’s weight is a common cause of wall-mount failure. Always check your TV’s weight in the user manual or online specs, and choose a mount that supports at least that amount.
How to find your TV’s VESA pattern
- Look up the model number online — many manufacturers list the VESA pattern in the specifications.
- Measure the distance between the centers of the two left-right holes and the two top-bottom holes on the back of your TV.
- Convert to millimeters if needed.
The pattern: Most 55-inch TVs use 400×400 mm, mid-size sets often use 200×200 mm, and smaller screens may use 100×100 mm. Samsung’s support page confirms that their TVs are designed to support VESA standard mounting brackets.
TV types and compatibility
LCD, QLED, and OLED models all can be wall-mounted as long as they have VESA holes. The main difference is weight: OLED panels are lighter, while older plasma sets can be very heavy. A Mount-It! VESA guide advises accounting for screen size, weight, and adjustability when choosing a mount.
Can I wall mount my TV myself?
Yes, with the right tools and careful planning. DIY mounting is common for TVs up to 55 inches. For larger screens, Samsung’s official mounting tutorial recommends having a second person assist. The key is anchoring into wood or metal studs — not drywall alone. Consumer Reports’ TV mount testing emphasizes that lag-bolting to vertical studs is the most secure method.
Tools required for DIY mounting
- Stud finder
- Drill with appropriate drill bits
- Bubble level
- Screwdriver (or socket wrench for lag bolts)
- Pencil for marking pilot holes
- Measuring tape
Step-by-step installation guide
- Locate studs with a stud finder and mark their edges. Standard spacing is 16 inches on center.
- Hold the wall bracket against the wall at the desired height, use a level to check, and mark pilot hole locations.
- Drill pilot holes into the studs (use a bit slightly smaller than the lag bolts).
- Attach the wall bracket with lag bolts — do not use drywall anchors alone.
- Attach the mounting arms or plates to the back of the TV using the VESA holes and the correct screws (usually included with the mount).
- Lift the TV onto the wall bracket and secure it according to the mount’s instructions.
- Test the mount by gently pulling on the TV to ensure it is locked in place.
DIY mounting saves $100–200 on installation fees, but a single misstep — such as missing the stud — can lead to a dropped TV and a ruined wall. For homeowners comfortable with tools, it’s a weekend project. For renters or those with heavy TVs, a professional installer is the safer bet.
Safety precautions
- Never mount directly into drywall without a stud — Consumer Reports calls this an anchor-only mistake that fails under load.
- Use a level to ensure the mount is perfectly horizontal.
- For TVs over 50 pounds, get a second person to help lift.
- Check that all screws are tightened to the manufacturer’s torque spec.
When to hire a professional
If your wall is brick, concrete, or metal stud, or if you are unsure about the stud location, a professional installer has the tools and experience to avoid costly mistakes. Many electronics retailers offer installation services starting around $150.
What are the rules for mounting a TV on the wall?
Four simple rules: (1) Mount only into studs or solid concrete/brick. (2) The center of the screen should be at eye level when seated — typically 42 inches from the floor. (3) Leave at least 2 inches of clearance around the TV for airflow. (4) Use a level and measure twice before drilling.
Find and mark studs
Mount-It! includes locating studs as the first step in its safe installation workflow. Without studs, the mount will pull out of drywall. Stud finders cost about $20 and are available at any hardware store.
Level the mount
A crooked TV is a nagging annoyance. Use a bubble level across the bracket before drilling pilot holes. Samsung’s tutorial recommends leveling first, then marking holes.
Cable management basics
After the TV is mounted, cables can be hidden in the wall using a cable management kit (in-wall rated cables and a brush plate). Alternatively, you can run cables along the bottom edge of the bracket if it has channels. Poor cable management can make a clean mount look messy.
Height guidelines for comfortable viewing
CNET advises that the center of the TV should be at or slightly below your seated eye level. For most living rooms, that means the center sits about 42 inches from the floor. Mounting too high — common over fireplaces — forces you to look upward, causing neck strain over time.
What are common TV mounting mistakes?
Even experienced DIYers make errors. Here are the most frequent pitfalls, based on findings from ITS Hawaii’s mistake guide and Consumer Reports.
Mounting the TV too high
The most common ergonomic mistake. CNET warns that a high-mounted TV places the screen center above seated eye level, leading to neck strain. Aim for 42 inches center height.
Ignoring VESA compatibility
Buying a mount without checking your TV’s VESA pattern is a waste of money. ITS Hawaii lists incorrect VESA matching as a top cause of fitting problems.
Using the wrong screws or bolts
Using screws that are too long can damage the TV’s internal components. Too short and they won’t hold. Always use the screws provided with the mount, or check the VESA screw size (typically M4, M6, or M8).
Poor cable management
Visible cables dangling from a wall-mounted TV ruin the clean look. Plan for cable routing before drilling — either through-wall cables or a raceway kit.
Laying a TV face down incorrectly
If you remove the TV from its stand, laying it face down on a hard surface — even on carpet — can crack the screen. Always place the screen on a soft, clean blanket or foam pad.
One in five DIY wall mount failures is caused by ignoring the VESA pattern or weight rating, according to industry repair data. That translates to a $500–$1,500 TV repair bill — or a new screen entirely.
TV stand vs wall mount: comparison
Four differences, one theme: wall mounting is permanent and space-saving; stands offer flexibility. Here’s how they stack up.
| Feature | TV Stand | Wall Mount |
|---|---|---|
| Floor space | Requires cabinet or table | Frees up floor space |
| Installation effort | Minimal — place on stand | Moderate — need tools, studs |
| Adjustability | Easy to move TV to another room | Harder to move; leaves holes |
| Viewing angle | Fixed unless stand swivels | Can tilt or swivel with right mount |
| Cable management | Hidden inside cabinet | Requires planning or raceway |
| Cost | $50–$300 for stand | $30–$200 for mount + tools |
| Safety tip-over risk | Needs anti-tip straps | Very low if mounted to studs |
VESA pattern common sizes
Six common VESA patterns, one rule: always measure before you buy.
| TV Screen Size | Common VESA Pattern (mm) | Typical Weight |
|---|---|---|
| 19–24 inches | 100×100 | 5–10 lbs |
| 24–32 inches | 100×200 | 10–15 lbs |
| 32–40 inches | 200×200 | 15–25 lbs |
| 40–50 inches | 300×300 or 400×200 | 25–40 lbs |
| 50–65 inches | 400×400 | 30–50 lbs |
| 65–85 inches | 600×400 | 50–100 lbs |
Upsides and downsides of wall mounting
Upsides
- Saves floor space, ideal for small rooms
- Better viewing angles with tilting/swivel mounts
- Reduces glare by adjusting tilt
- Gives a modern, floating look
- Lower tip-over risk when mounted to studs
Downsides
- Installation requires tools and studs
- Harder to access ports or cables
- Leaves wall holes if moved
- Heavy TVs need two people to install
- Potential for screen damage if laid face down
The pattern: A wall mount trades flexibility for a cleaner look, so the choice hinges on whether permanence fits your living situation.
Step-by-step: How to safely mount your TV
- Read the manufacturer instructions before drilling (Mount-It! guide).
- Locate studs with a stud finder and mark their center.
- Hold the wall bracket at your chosen height, level it, and mark pilot holes.
- Drill pilot holes into the studs with a bit sized for the lag bolts.
- Attach the bracket with lag bolts using a socket wrench. Do not overtighten.
- Attach the TV’s mounting plates to the back of the TV with the correct VESA screws (Samsung tutorial shows steps).
- Lift the TV onto the bracket — get help for TVs over 50 lbs.
- Secure the TV with the mount’s locking mechanism.
- Test stability: gently pull the TV forward to ensure it doesn’t detach.
Confirmed facts and what remains unclear
Confirmed facts
- Wall mounting saves floor space and improves ergonomics when installed correctly (CNET).
- Most modern flat-screen TVs (2006+) have VESA mounting holes (Kanto Mounts).
- Stud finders are essential for drywall installation (Mount-It!).
- Using a level prevents a crooked TV (Samsung).
What’s unclear
- Ideal mounting height varies by viewer preference and room layout.
- Best mount type (fixed, tilting, full-motion) depends on wall angle and lighting.
- Whether a DIY install is safe for someone without experience depends on individual skill and wall type.
Expert perspectives on wall mounting
“Always use a stud finder and never mount directly into drywall alone. The studs provide the necessary support for the weight.”
— Professional TV installer, quoted in Consumer Reports
“If your TV is more than five years old, check for VESA compatibility before buying a mount. Many older models lack standard holes.”
— Technician at Mount-It!
Final verdict: Is wall mounting right for you?
Wall mounting a TV is a practical upgrade that saves space and improves your viewing line. But the hidden costs — a broken drywall, a dropped screen, or a perpetual neck crick — come from ignoring the basics: studs, VESA compatibility, leveling, and weight ratings. The choice is clear: if you can commit to a permanent position and are willing to invest an afternoon in proper installation, wall mount your TV. If you rent, move often, or simply prefer flexibility, stick with a stand. For the homeowner with a drill and a stud finder, the reward is a clean, safe setup that looks like it was professionally installed.
mountup.com, nytimes.com, youtube.com, x.com, youtube.com, consumerreports.org
Frequently asked questions about wall mount TV
Do wall mounts damage walls?
If installed correctly into studs, the holes are minor and easily patched if you remove the mount. However, mounting into drywall alone can cause large cracks or pull-out damage. Use a stud finder and follow the mount’s instructions.
Can you mount a TV on plaster walls?
Yes, but you need to locate the wood laths behind the plaster, or use toggle bolts designed for plaster. It’s trickier than drywall — many pros recommend hiring an installer for plaster walls.
How much weight can a typical wall mount hold?
Most single-stud mounts hold up to 50 lbs. Dual-stud mounts can hold 100+ lbs. Always check the mount’s weight rating against your TV’s weight.
Is it safe to mount a TV above a fireplace?
It’s possible, but heat from the fireplace can damage the TV. Use a tilting mount to angle the screen downward and keep the TV at least 6 inches above the mantel. CNET notes that this often places the TV too high for comfortable viewing.
Can I use a wall mount for a curved TV?
Yes. Most curved TVs have standard VESA patterns. However, the curved shape may require spacers (included with some mounts) to keep the screen level.
What tools do I need to mount a TV myself?
A stud finder, drill, level, screwdriver, pencil, measuring tape, and a socket wrench for lag bolts. A second person is recommended for large TVs.
How do I hide cables after mounting?
You can run cables inside the wall using an in-wall rated cable kit and a brush plate. Alternatively, use a raceway that sticks to the wall and paints over. Always follow local electrical codes for in-wall cable routing.
More related posts
 White Sox vs Blue Jays Match Player Stats & Analysis
 Burt Reynolds: His Illness, Death and True Love
 Donna Reed: Jimmy Stewart Feud & Age in Wonderful Life
 What Is a Cashier’s Check? Complete Guide, Costs & Risks
 Tom Ford Oud Wood – Complete Review and Buying Guide
 Frida Kahlo: Life, Art, Legacy and Key Facts (1907–1954)
 Where to Watch Survivor: Paramount+, Hulu, Pluto TV & More
 William H. Macy: Age, Wife, Movies, Net Worth, Bio